Friday, August 14, 2015

Diy Elf on Shelf

Every August when school is about to start a little panic starts to creep in, the panic of fall/thanksgiving/Christmas.  We are always unbelievably busy from mid September through New Years and it flys by.  Which always inevitably makes me sad.

I know I'm not the only one who is starting to think about Christmas and I know there are fellow crafters out there who have already started on their handmade gifts, so I thought I'd post this Christmas post early just in case it inspires someone, there will be no need for a last minute rush.

Last Christmas I started selling handmade Bit of Whimsy dolls, sort of by accident. In the midst of all those doll orders I was asked if I'd thought about making a version of elf on the shelf. A woman my mom worked with wanted to purchase the store bought version for her grandchildren but just couldn't swing $29.99 each.  I was actually sitting in the same boat with her.  After purchasing a couple of my dolls she asked about the elf.  I immediately said no.
After all, the previous year I had searched for ideas for homemade versions and came up empty handed, and I'd never attempted something like this from scratch.  Then I thought, why not give it a whirl.
I think it's important in the blog world to show crafting & sewing fails every now and then, so here's my first try at making an elf
He was really skinny, his side seams were bursting and I made the arms and legs so skinny I couldn't hardly turn them right side out or stuff them.

After my elf flop I redid my pattern making it bigger and tweeking a couple other things and created this:

These are actually the 2 I made for my cousin's twin boys. 

Seriously how cute are they?

And of course no more than my mom took one to work I was asked about a girl version, and so she was made.
All of them have bendable arms and legs so they can actually sit upright on a shelf, or anywhere else you want to sit them.

I had some people order these to take the place of the store bought elf, others already had a store bought one but wanted one of mine for their kids to actually play with, since technically your not supposed to touch elf on the shelf or he will lose his magic.
Sadly I didn't get a chance to make my own kids elves so that is my plan for this year.

Thursday, August 13, 2015

The Accidental Handmade Business

I can not believe it's been over a year since my last post, craziness! I guess 2 kiddos running around hasn't given me much time,or maybe I'm just not as great at time management as I thought. Either way, I have been crafting.  In fact last Christmas I unknowingly started a small side business called The GracieLynn Shop.  How do you start a business and not know it? I made my daughter, 9 months old at the time, a Bit of Whimsy Doll.  The Baby pattern, which is absolutely adorable by the way, is the one I purchased and it's smaller than the other ones I've made making it the perfect doll for my little one.

So of course I was so proud of the cuteness I created I posted a picture on Facebook and the orders started coming.  Friends of friends and family members were all wanting homemade dolls for their sons/daughters, grandson/daughter, niece/nephew, and baby shower gifts.

It was truely a blessing because we were unsure how we were going to afford Christmas & going to see my husband's family. I had been praying about it a lot and then this kinda fell in my lap.

I made 4 different girl dolls


And some boy dolls,

Cute little babies

Christmas rolled around and I was asked to make elves (more on that in another post).

And then Easter rolled around and I started making bunnies.
  I used the Sleepy Bunny pattern from Mmmcrafts.

I've had so much fun making them!

Wednesday, July 23, 2014

Relay For Life 2014


Our Relay was at the end of June this year and while I'm relieved the festivities are over (due to the amount of preparation and work involved) I'm also sad because I thoroughly enjoy it.

We had some new team members this year so I spent the whole of one evening painting more team shirts using the freezer paper stencil method.  I think I ended up finishing about 15 shirts including a onesie for our youngest relayer.

We stepped it up this year with games at our campsite.  One of them was the fishbowl game.  A classic carnival game we all love to play but our parents dread because it comes with the possibility of owning a goldfish.  We didn't want to buy a bunch of goldfish, nor do we as parents want to put that on other parents so the solution was Swedish Fish and Goldfish crackers for our younger relayers as prizes.

 
I created a cute little tag for each of the prize baggies that said "Thank you for supporting Betty's Hope" so people would know where they won their prize and who we were.  I created them in Picmonkey and they were super easy and I think, a great little added touch.
Here are the games we had at our campsite, the fishbowl game and the Cancer Sucks game which was like a lollipop tree but in a flower pot instead.  We had a small bucket of trinkets if you picked a lollipop with a black tip you won a prize.  If you picked one without you still got to keep your lollipop.

We also had homemade cookies and a fleece blanket raffle.  For a few of the team members I busted out the good ol' Cricut and made team cups.  I purchased the clear tumblers from the Dollar Tree and used my breast cancer awareness cartridge to create the image and the calligraphy cartridge for the words.
We bought the trifold boards at the Dollar Tree and I used my cricut to cut out the letters.  We were really psyched with how good they looked.  Not to mention super easy to read as you walked by our campsite.

We like to take care of our overnight and early morning walkers so I whipped up some breakfast burritos filled with egg, sausage, green pepper and cheese.  I wrapped them in plastic wrap then in foil and around 3 am they go into the crockpot on warm and are hot and ready for everyone within an hour or so.

This is the second year I've made these and everyone really loves them.  They are easy to walk and eat at the same time which is perfect for any relayer.

We are already coming up with ideas for next year's relay and I'm excited at the possibility of new team members, and more money raised.  This year we have almost hit our goal of $1500.  Last year we raised just over $1000 and the year before (our first year) we raised $500.  We are steadily increasing and that's exciting for us.

If you want information on a Relay for Life event near you go to relayforlife.org for more information.


Monday, July 21, 2014

Peekaboo Bonnet for Eva

I saw the Peekaboo Bonnet pattern over at Made By Rae while I was pregnant with Eva and fell in love with it.  I told my husband if we had a girl I was buying that pattern and I would make her a dozen of those cute little bonnets.


Well, we had a girl and I promptly bought the pattern.  I let it sit on my kitchen table for a good week and a half completely intimidated.  I had never worked with piping and my ruffling and binding skills leave a lot to be desired.


I kept reading reviews for the pattern and of course everyone said how easy and quick the pattern was but I still didn't believe them so I let the pattern sit....stupid me.


Finally a couple days before my family reunion, which was to be held outside at the end of June can we say HOT.  I knew Eva needed that bonnet to protect her little head and keep the sun out of her eyes so I kicked my butt in gear and decided to just start sewing and see what I came up with.

Is this not the cutest little bonnet EVER!

I love it and I want to make 23 more.  My husband says it looks Amish and he's not a fan, I told him I don't care I'm making one in every color of the rainbow and a few extras after that.

And let me tell you this pattern was super easy.  After my pieces were cut out, because I did that on a separate day, it took me all of a naptime to finish it.  And if you have ever read my blog before you know naptimes in this house are never very long.  The only thing is I don't consider mine reversible because I machine stitched the center strip instead of hand stitching like Rae recommended, so the seam on the inside was very visible.  It doesn't look so bad that I couldn't reverse it if I wanted I just prefer to not see the seam. 

I've gotten so many compliments on it and Eva is the cutest little girl ever in it.  Sometimes I put it on her just so I can marvel at how adorable it is, and she is in it.

Friday, July 18, 2014

Hulk and Iron Man Freezer Paper Stencil Shirt

Hulk Smash!


That's what my 3 year old runs around our house saying...over, and over and over.  He loves the Avengers.  He loves superheroes.  He always notices the shirts in all the stores with these characters on them but lets face it, I'm not made of money, he has plenty of other shirts, and they are always upwards of $15 each.


And what does a DIY Mama do when she doesn't want to spend a small fortune on character shirts but really wants to give her little one what they want?


She makes it herself of course.


So I took a little trip to Hobby Lobby picked out a green shirt, they are less than $3 each after their "Always 30% off" discount.


I got online and googled, "Hulk freezer paper stencil", and somehow found an image of half a face that was supposed to be the Hulk.  I then went to Dafont.com and found a font that was more comic book-ish because I knew I didn't just want the face on there, there needed to be some kind of wording so anyone and everyone would know who it was supposed to be.


Of course the wording immediately came to me, it had to be, Hulk Smash!
Someone told me it's more of a Lego version of the Hulk and it probably is, but Grant knew exactly who it was as soon as he saw it and he loved it.  What did he say after he talked about how much he wanted to wear it, "right now!"?

Mommy where's my Iron Man shirt?

Another trip to Hobby Lobby later for a red shirt and a trip to Joann's for a small bottle of gold metallic fabric paint (because Hobby Lobby didn't have any) and he now has an Iron Man shirt as well.


To find the above image I simply googled, "Iron Man freezer paper stencil".  I now have 2 other shirts in the works for a Spiderman and one with the Avengers emblem on it.

There are dozens of freezer paper stencil tutorials out there which is why I didn't make one for this project.  I don't think I do anything different from anyone else.  Here is one I looked at before I did my first project last year.  If you've never done freezer paper stencils, go to the store and buy some freezer paper right this second!

You will quickly become addicted and coming up with your own shirt designs for you or your little ones.

Thursday, July 17, 2014

Smore's Trail Mix

Since I'm keeping a 10 year old this summer I wanted to come up with some different snacks than I normally do.  I'm not one to have a lot of cookies and cakes for snack time.  I prefer cheese crackers, fruit, pretzels and graham crackers with Nutella.  I figured a 10 year old who's used to the more junk filled snacking would get bored with my versions pretty quickly so I started thinking up ideas for a happy medium.


Enter in trail mix, not just any trail mix....s'mores  trail mix.  Does trail mix get any better than that, and who doesn't love s'mores?


If you answered, "me" to that question you are either lying to yourself, or haven't tried one made to perfection.


Either way you will love this and so will your kids.


It's as simple as pouring some Golden Grahams cereal, mini marshmallows, and chocolate chips in a bowl, giving it a stir, and separating it into those cute little snack baggies.

Now toss one to each of your kids, try not to whack them in the eye when you toss them, and don't forget one for yourself because, yes, you will want some too.

Friday, June 13, 2014

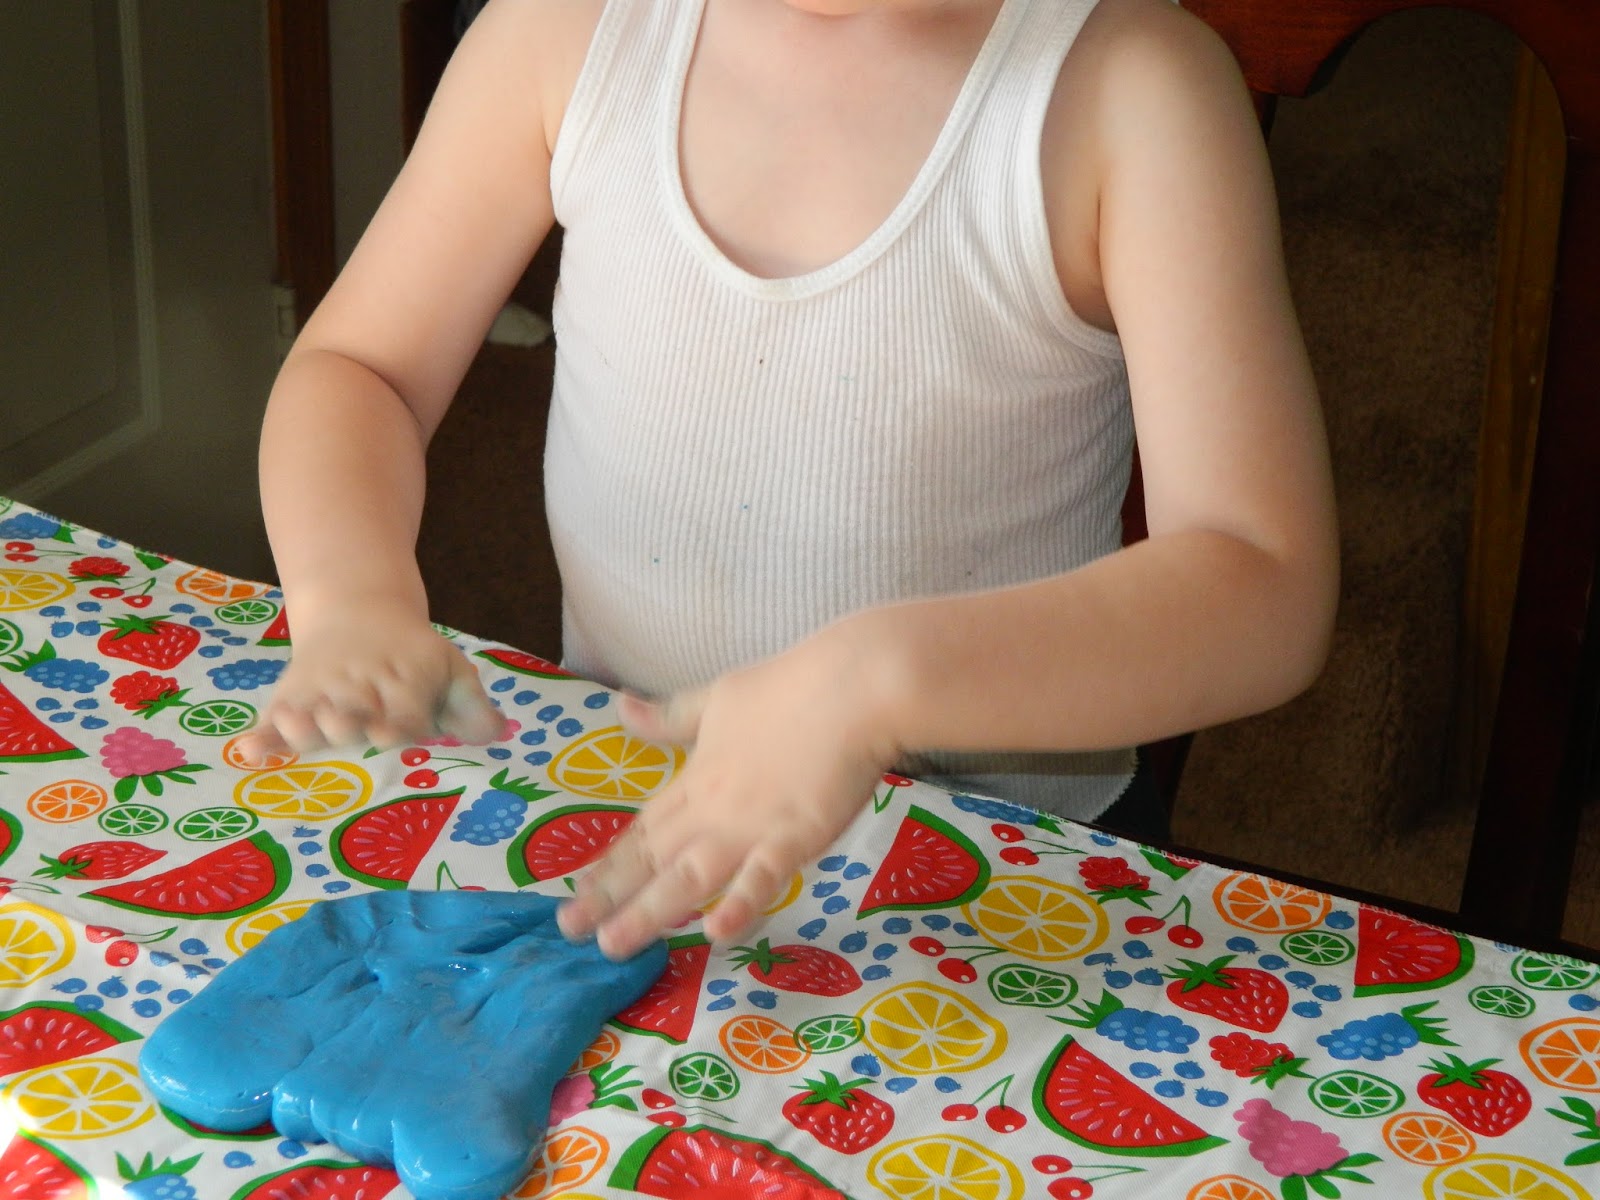
Flubber Fun

Since I started watching my 10 year old cousin this summer I've been scouring the internet and trying my best to come up with some activities that will both occupy a 10 year old and 3 year old and will keep their attention for more than 37 seconds.

After the first couple days of our new summer routine  I adopted the attitude that as long as it was entertaining for them I would not freak out about the mess the projects made.  Needless to say I have done my fair share of cleaning my apartment and yet it is never clean, but the kids have had fun and that's what's important.

One activity we used to do a lot during my days working at a daycare was making flubber.  I've read where people say it is dangerous to use the borax because it's a chemical and all that but I make sure the kids wash their hands after playing with it, don't put it anywhere near their mouth, and the amount in flubber is very small so truthfully I'm not concerned, you can make up your own mind and decide what is best for your children.

I think the second best thing about this project (the first being that it kept them occupied for a good 45 minutes on numerous days) is that I already had all the ingredients at my house.  So no extra trip to wally-world where I would inevitably walk out with a cart load of goodies instead of the glue I went in to buy.

Recipe:

3/4 cup cold water
1 cup Elmer’s glue
liquid food coloring
1/2 cup hot water
1 teaspoon borax (you can find this in a box in the laundry aisle)
directions:
step 1: in bowl 1 – mix together the cold water, glue, and food coloring. set aside.
step 2: in bowl 2 – mix together the hot water and borax, until the borax is completely dissolved.
step 3: slowly add glue mixture to borax mixture. mix well. pour off excess water.

**disclaimer: if your child is like my son and squirts half the bottle of food coloring in his flubber mixture he will inevitably have blue tinged hands every single time he plays with it.
Recipe from here: http://www.livecrafteat.com/craft/homemade-flubber-for-kids/#ixzz34EWcdCfJ


I halved the recipe and gave each of them the necessary supplies to mix their own flubber.  I did not let them touch the borax, only stir it once I had added it to the hot water.  This was the perfect amount for each of them to play with.  Store your flubber in a plastic baggie (sandwich size is perfect for a halved recipe) and it stays good for at least a week.

I have every intention of stocking my craft cabinet with glue this summer during the back to school sales to have it on hand for future rainy days, and the cold days of winter.


LinkWithin

Related Posts Plugin for WordPress, Blogger...

Total Pageviews